

Hi all,
Here I am with another article that can get you a little bit higher on your IAM ladder. In my previous articles, I talked about what OAuth is, it’s grant types and what OpenID Connect is. Today I intend to give you hands-on experience with a real-life OAuth and OIDC implementation that is used by more than 100 companies around the world, and it’s the WSO2 Identity Server’s OAuth/OIDC implementation.
Let’s see a 10,000-foot view of what we’re going do to, first. The following is the user story.
- Imagine we represent a company with several hundred employees and the user base is secured with the WSO2 Identity Server.
- Now we’re developing a client application to be used by the employees, and the app requires some information of the user for its functions.
This is a very basic use case that can be catered through OAuth and OpenID Connect. We can simply integrate our client app with the Identity Server by creating a Service Provider. Whenever a user clicks the login button in the client app, the user will be redirected to the Identity Server and he/she can log in. Once logged in, the server will send and ID token with required user information to the client app.
Following are the key components that we need to get this thing up and running.
- The latest WSO2 Identity Server. (Obviously! :p)
- A Service Provider in the Identity Server.
- A sample client application and the Apache tomcat server to host the client application.
OK, let’s begin.
Step 1: Getting the WSO2 Identity Server.
Download the WSO2 Identity Server if you haven’t already, using this link. Extract the zip file and run the server by executing the wso2server.sh file inside the bin directory.
Step 2: Getting the sample application.
We have a number of sample applications in the samples-is repository. Clone the repository using below command.
git clone https://github.com/wso2/samples-is
Navigate to the cloned repository and build the project using Maven
cd samples-is
mvn clean install
The app we’re looking for is located in sso-samples > oidc-sso-sample > pickup-dispatch folder. Copy the pickup-dispatch.war file created in the target directory to the webapps directory of your Apache Tomcat deployment, and restart the tomcat server.
Step 3: Creating a Service Provider.
For any external application that connects to the WSO2 Identity Server needs a Service Provider created in the server. We can consider this entity as the agent inside the server that handles all activities of the client application. To create a new service provider, use the below steps.
- Log in to the management console using default username and password, admin: admin.
- Click on Add under Service Provider section.
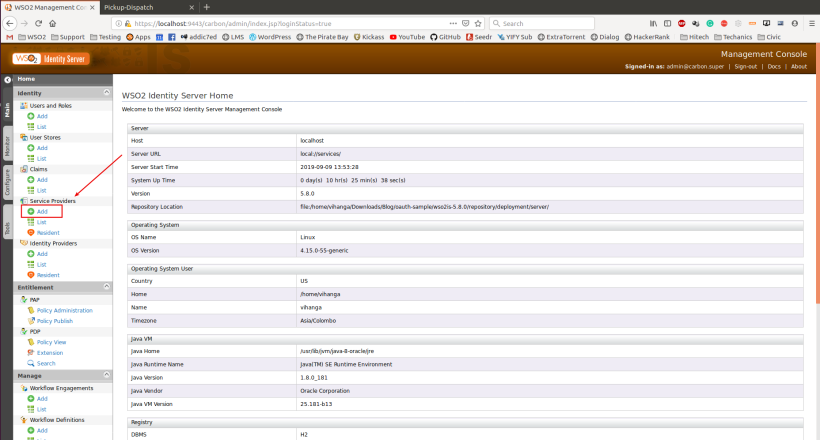
- Provide a name for the Service Provider and click on Register button.
- Now click on Edit and then Inbound Authentication Configuration > OAuth/OpenID Connect Configuration.
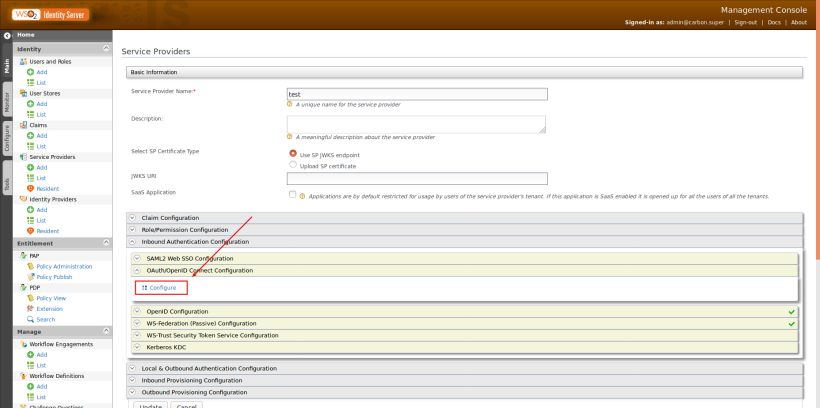
- Now comes the screen where we can set the OAuth and OIDC configurations to the service provider. The only configuration we need to do is adding the call back URL. We can keep all other settings as it is.
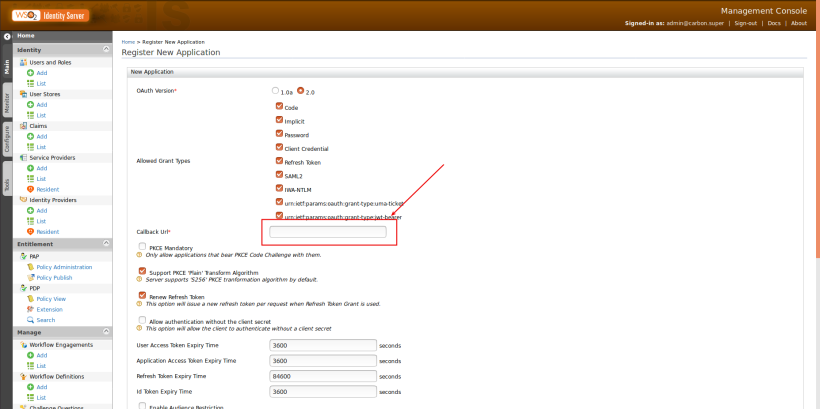
- Add http://localhost.com:8080/pickup-dispatch/oauth2client as the call back URL and click on Save.
Note: Please add localhost.com to your hosts file (/etc/hosts in Linux) since the sample application is designed to use that domain.
Step 4: Setting up the sample application.
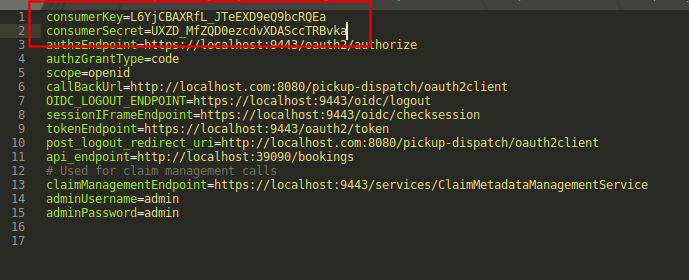
When we add OAuth/OIDC configuration to the Service Provider, Identity Server will produce a consumer key and a secret which to be used by the external application. We can get this key/secret by Clicking on the Edit button of the service provider and expanding the OAuth/OpenID Connect Configuration section under the Inbound Authentication Configuration section.

Open the file <TOMCAT_WEBAPPS_DIR>/pickup-dispatch/WEB-INF/classes/dispatch.properties and update the above extracted consumer key and secrete accordingly.
Restart the tomcat server to apply the property changes.
Testing the Flow.
Setting up is done now and we can test the flow. Create a new user in the Identity Server with your name for a better experience. You can use the same admin account as well.
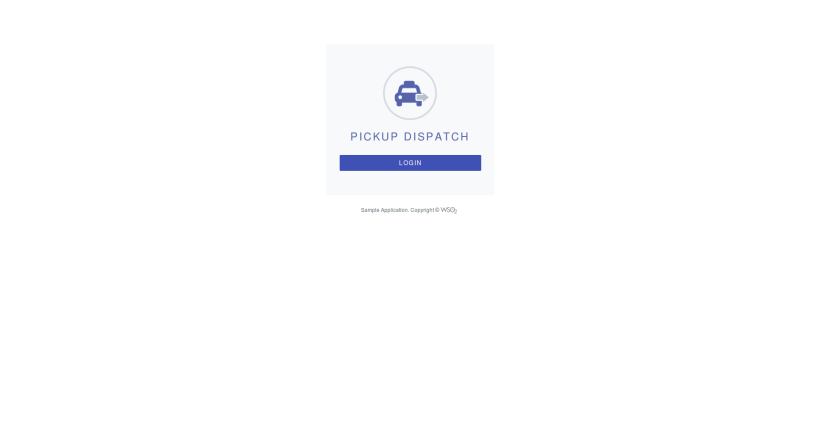
- Access the URL http://localhost.com:8080/pickup-dispatch and you’ll see the welcome screen of the app with a login button. Click on it.
- You’ll be redirected to the WSO2 Identity Server login page. Enter your credentials and log in.
- Then the server will ask consent to share your information with the client application. At the moment the app only needs your username.

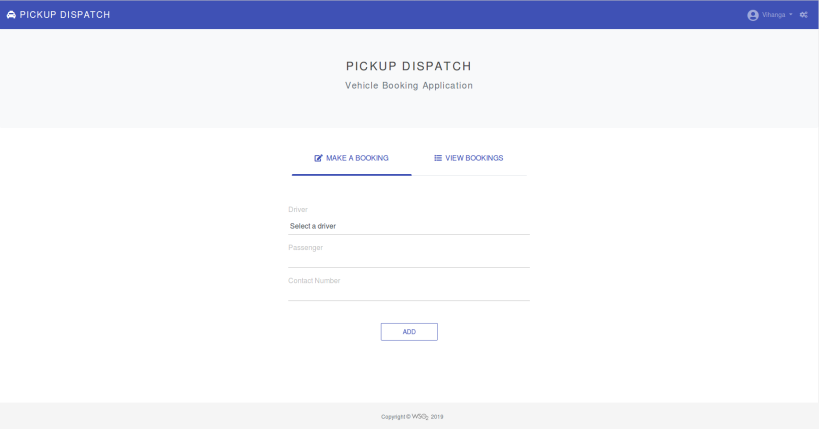
- Once you clicked on Continue, you’ll be redirected back to the client app and you’ll see the home page. Notice your username displayed in the upper right corner of the page.
Recap
Let’s see what actually happened underneath.
- When you click on the login button of the app, it initiates an authentication request to the Identity Server with the consumer key and the consumer secret we configured earlier.
- Identity Server identifies the app and prompts the login page to the user.
- Once login, ask for the user concent based on the user attributes requested by the application.
- If the user gives his/her consent, an authorization code is returned to the application’s configured callback URL.
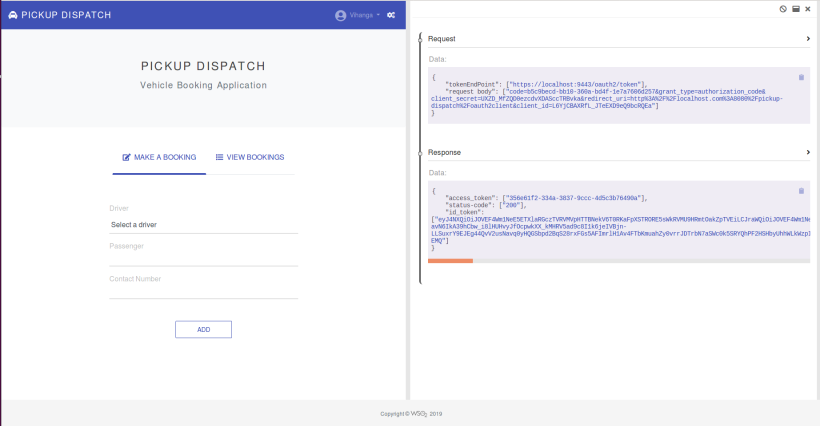
- Then the app makes a back channel call to the Identity Server with the code and the server returns an ID Token with the user’s details.
You can view the backchannel request sent by the app and the obtained ID Token by clicking on the gear icon in the upper right corner of the home page.
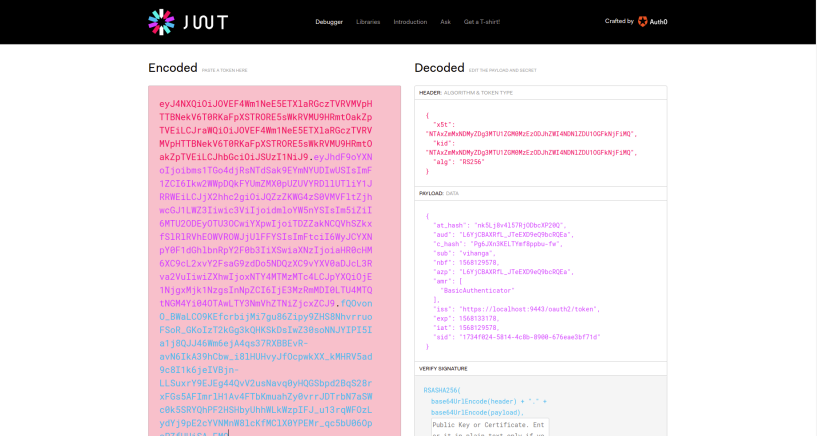
You can paste the ID Token in jwt.io to decode and see the content.
I hope you learned something new and interesting. If you have any question, please add a comment.
Cheers!

Pingback: Writing a Custom Local Authenticator with WSO2 Identity Server | everything I know