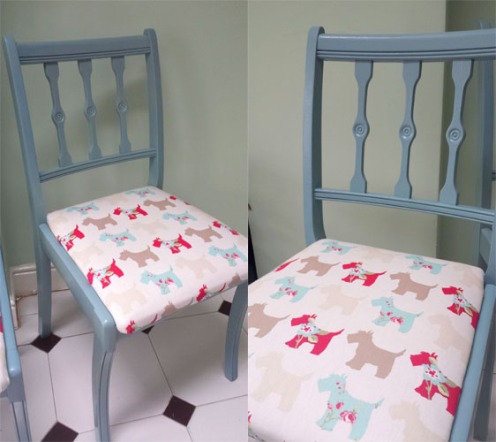
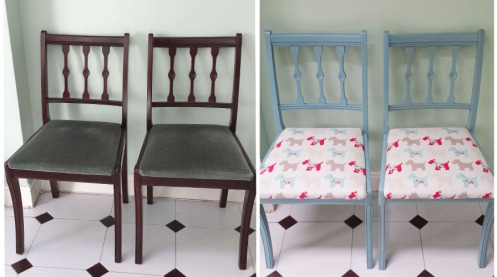
A new life for an old pair!
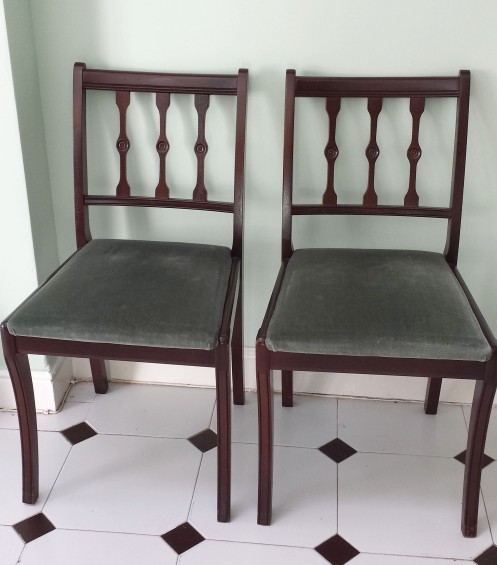
A pair of chairs that is… my mum-in-law was about to throw out these two ugly old girls when I thought ‘why not rescue them and give them a much needed makeover?’ (I can think of a few people I know who could do with the same! lol!) Anyhoo… Inspired by all the DIY shows I see on tv and my own new lease of life in the Uk, that’s just what I set out to do! I had never really got my hands dirty and tried anything like this before but I’m so glad I did… it was a lot of fun and so rewarding to see the end result.
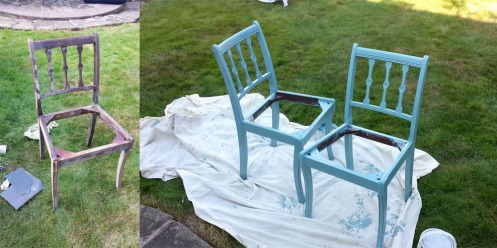
First of all I had to sand them down, which was probably the only tedious bit of the whole process… (well until my husband came down to see what I was up to and introduced me to his hand-held sanding machine!) None the less I had to sand down most of it by hand! Then it was a just a matter of painting them a pretty colour, and for my luck, a can of pale blue paint lie in wait for me in the garage! I happened to have everything I needed for my little project right at home… except for the fabric to cover the seats but I’ll get to that in a bit! The painting was the most fun part for me! I enjoyed every stroke… felt like a real pro after a while! Then it was on to finding a fabric which would make these girls look pretty again!
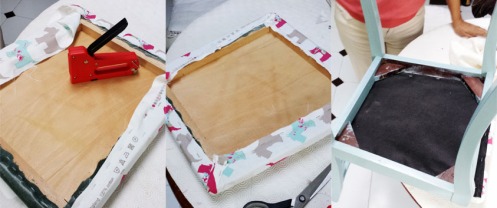
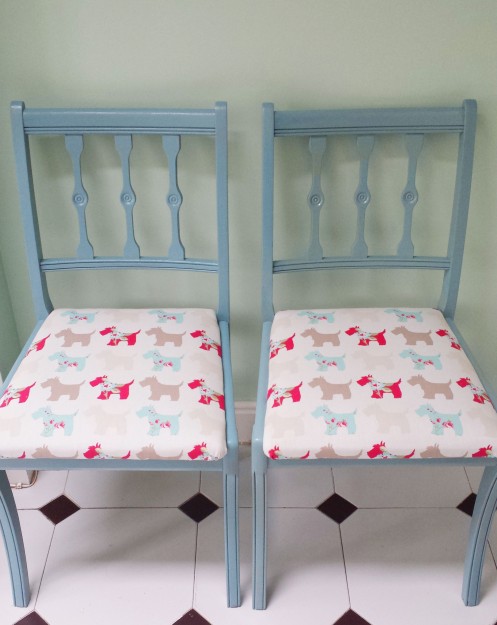
I was certain that when I saw the right fabric in the shop I would ‘just know’ and it would be as simple and straight forward as that! However mum-in-law took me to a huge home store with hundreds of rolls of printed cloth! Stripes, dots, florals and modern designs galore! I was almost about to settle for a safe and refined beige and blue striped fabric when I suddenly spotted one that captured my heart! It was cute, colourful and country-esque with little Scotties all over it and some floral print too! Scotties like the Radley logo! I quickly changed my mind and was on my way with a meter or so of pink, blue and beige Scotties in hand! Reupholstering the seats were quite easy with a staple gun (and a little help from my MIL) as you can see from the pictures above. Then it was a matter of screwing the seats back on to the chairs and Voila! They were done! They looked so pretty and brand new! I was so very proud of them.. take a look and see what you think! Still not sure what to do with ’em though as they don’t really fit in with the colour schemes at our house but I might keep ’em for sentimental reasons! 😉
The before and after is quite something.. hope you might be inspired to rescue and restore something old in your house too.. it might turn into your favourite piece of furniture in your home!

